Ahh the glorious internet provides once again, especially when it comes to Warhammer 40k stuff.
This time taking me back to the early 90's, White Dwarf Magazine and a model you could make at home if you were in your early teens and didn't have much cash to burn on Games Workshop models. (Although now being 41 years old with bills, family life and debts, I'm pretty much in the same boat anyway.)
I've found the magazine again which means all these years on, we can now build another scratch built Warhammer 40k Ork Gobsmasha!
There simply isn't enough space in this little slice of the internet to really cover the Warhammer 40K Universe and everything it entails in any chance of doing it justice so for the uninitiated, allow me to break it down as simply as I can:
- 40K is a fictional future universe that has spawned booksGo, comics, a movie and plenty of video games and apps. Most famously though is the table top game where two or more players use large armies (comprised of miniature models as seen above) to battle it out over a battlefield.
-White Dwarf was a magazine dedicated to the game, painting, lore, everything for both Warhammer 40K, Warhammer Fantasy and other Games Workshop games such as Blood Bowl. I borrowed them all the time from my local library and bought them from Games Shops on occasion.
-Back in 1991 they had an article on how to build an Ork Gobsmasha which looked like a lot of fun and back then I figured, hell let's give it a crack!
 |
| This was the mag. God I'd love to read them all over again. |
-So I built one! From memory out of an empty box of cereal and a few coffee jar lids. Sadly I don't have any pics of this (we're talking decades before camera phones were a thing) but I remember it came out okay. Okay for a 13 year old still wrapping his head around working with models and painting, which would mean closer to the original (above although far more haphazardly painted) then this masterpiece here:
Luckily the wonderful people at
Bell of Lost Souls have uploaded this very article! Which means I can have another go (well as many goes as I like really) to give it another bash! Even better, it's another excuse to fire this baby up and get the airbrush booth hissing and spraying away again!
Will it be better than my original? Undoubtedly. But I'm more looking forward to the inevitable feeling of being 13 again, the smell of craft glue and the family wondering where all the coffee lids scarpered off to. Good times!
Wish me luck, pics coming as the build commences!
THE BUILD SO FAR
So I've printed my plans out for the Gobsmasha and before you can say 'Let's not over complicate things here' I've started to overcomplicate things. Mainly over engineering things because I want this this song enough to survive a possible cat attack (don't even think about it KeKe!) and because Ork.
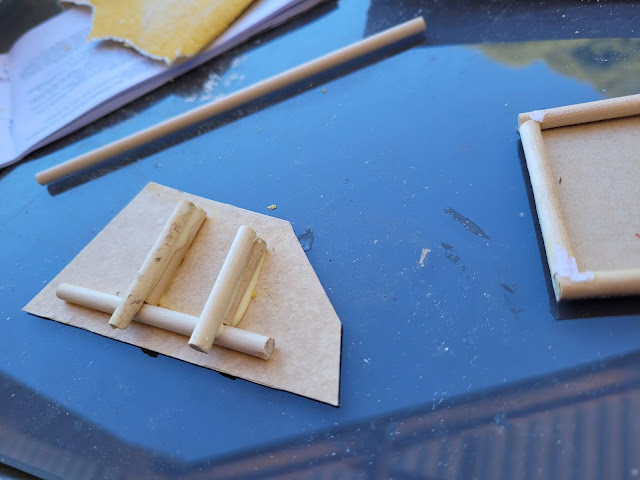
So I'm strengthening things up with a wooden roll cage!
The local cheap store near work has a great craft section and for under $10 I have a great start to the structural side of things. While the knife is sharp, I wouldn't suggest trying to saw with it so that job's gone to a small fret saw. The glue I'm using is
Titebond (amazon link) which I had leftover from some guitar repair which dries tough and so is completely overkill for this project.
Measurement? Kind of. But I'm not too worried if things don't match up as I plan to lay even more plating over everything in a true Warhammer 40K Ork way. It's supposed to look rough and if there's one thing I'm good it, it's rough!
I wasn't planning on the structure locking into place when I was working on it but hey, if the spanner fits...
You can never have enough structural panels in an Ork Gobsmasha, I mean how else is it supposed to take on Nectron Lasers?
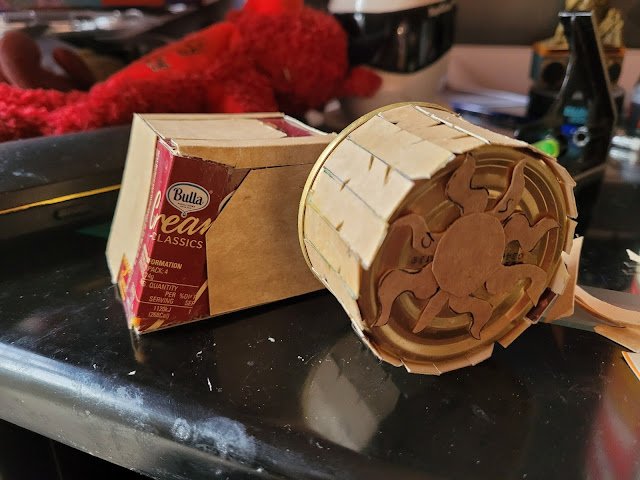
An ice cream sandwhich box has sacrificed itself for the good of Ork kind. I expect many more of them to be cut up before this project comes to an end.
Rough as I feel after a night of drinking which is to be expected but expect plenty more cardboard to patch up gaps and add to a real 'weld on even more plates for battle!' type of feel.
A few weeks later and the build now has quite a few more panels thrown on for good measure and I've worked out what the wheels are going to made of, cat food tins! (No I didn't have to buy a cat to help empty the four I needed, she was already here.) After a quick rinse and dry in the dishwasher, they're good to go!
The titebond does a great job of keeping the wheel panels in place and no two panels are the same for that 'random Ork build' look I'm really going for. Who needs things that line up? We're not space marines here!
When this is finished it will be a grinning red skull.Well that's the plan at this stage.
The wheels are on the large size and I'm still trying to work out how to put them on (maybe some kind of wooden axle setup I can place the tank body on? But that's for later on. Right now with one done, I can work out basic paint schemes with what I've got on hand.
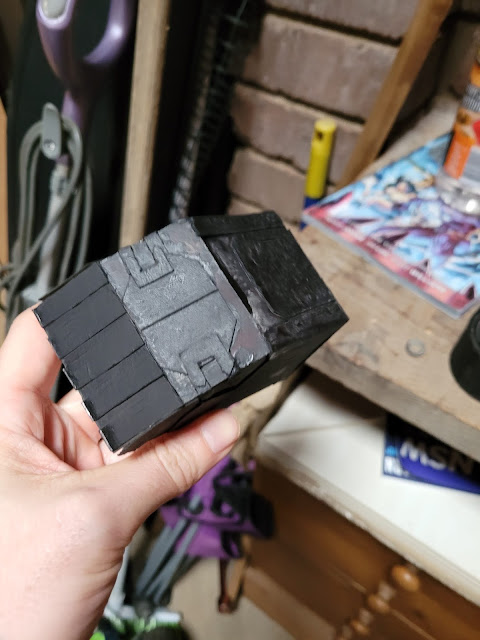
I'm using Abbadon Black as a base coat because it's easy to mix and fast to dry. You still can mix too much water though which doesn't help as shown here:
While the too wet paint goes okay with the cardboard, it doesn't like sticking to the metal and instead of a nice flat black base coat, this thing looks like it got too close to a promethium explosion. Something that Sgt Silverous of the Badly Painted Squad seems rather happy with.
 |
| A good Ork build is a burnt one! - Silverus |
Thankfully a second coat with the less thinned base coat gets things looking a little better.
I couldn't find an enamel flat red for this build at the local hobby shop however I did find this and it's a great opportunity to test drive the Italeri range. Apparently it's great for brush and airbrush and since it was on sale for just $3, how could I say no?
Italeri Flat Red (Amazon link)
Spraying a pink at first, a good shake got things where they should be and I was delighted to discover that the paint can go straight into the cup without any additional water. I'm super impressed with the first coat as with the two black undercoats, I've already created black panel lines without any effort. Just one coat has given me a worn look already and I'm tempted to see how we go just leaving it like that.
Top job Italeri!
 |
Looks dangerous Captain, shall we blow it up? -Goldious
The wheels are going to get a light spray of this, one of the few citadel paints I have after buying a couple of those 4.95 40k collection starter magazines. It came with a brush, paints and some space marines, a great deal!
With the black undercoat it hasn't come out too bad! I think my wheels might be a touch too big...oh well. Putting a gun up front might help balance things out..(but still, the bigger the wheels the more crushing that can be done!)
For the cannon I've opted for a gattling gun setup using the last of the wooden poles glued together. The socket here helps keep them in place when it comes time for the undercoat.
The base is a bottle top dremelled out. Looks rough but hey, so does the rest of the build!
TO BE CONTINUED |


Comments
Post a Comment