While I try to work out what's happening with my dismal Supercoach season (truly, it's horrendous) let's get back into airbrushing! Something I briefly explored a little over four years ago before I had to sell up shop and move up north. (In the end I only ended up painting one car model with it and results weren't great!)

Now that I've finally got the time, the space and more importantly another compressor it's time to break out the brush and shake some of this rust paint off!
My setup
(I've included Amazon affiliated links to either the products I use or their equivalents if you want to try airbrushing models yourself although if you've got the time and energy, you may be able to scoop up some local bargains either via Facebook, Craigslist or Gumtree to save yourself some coin. Buy your paints new though for less headaches long term.)
THE LUNGS - MARQUIP TIGER 12 LITRE (3 GALLON) AIR COMPRESSOR

It's little, it's loud and at first I thought it would be hilariously undersized (especially since my last compressor was a staggering 140 liters in comparison). Yet with a full tank, the airbrush runs out of things to spray long before this thing runs out of air.
Apparently Italian made, I can't find much about this particular model at all but it was the best use of $40 one afternoon on Facebook classifieds as I've been using this roughly every weekend since I got it. The guy I bought it from even threw in the air blow gun and cord because apparently it didn't fit his larger compressor - score!
At first I thought I'd need an adapter to connect my airbrush to this thing but dismantling part of the Nitto connector on the supplied air gun was more than enough to connect things up and get things working.
(Also no sign of leaks, something the Black Ridge hose I used before wasn't great at stopping..)
Where to buy: This exact model? I have no idea. I've never heard of it until now. However there's heaps of options available on Amazon, just make sure you read the reviews especially from anyone using them for airbrushes. Remember the more air it holds, the less time you need to stop and wait for it to fill again.
THE WEAPON OF CHOICE - IWATA NEO CN

I read a tonne of reviews that this was the best entry level model to kick things off with and quite a few steps above anything available through general hardware stores. At a little over $100 it's not the cheapest obviously but mine has copped a lot of paint through it recently and provided you clean the thing every time you use it, it does quite well.
It doesn't look like it'll hold much paint but trust me, depending on the viscosity of the paint you're using then that cup up top will last ages.
I've become quite good at breaking it down to give it a thorough scrubbing but here's a top tip don't unscrew the tiny tip behind the nozzle unless absolutely necessary. No seriously, it's so tiny you will lose it and it'll be another $10 bucks to get another one. Clever me lost it in the first week too - I was working on the back deck and bang, it slipped out of my fingers and through a gap in the board. Short of a metal detector under the house there was no chance of finding it again. Good thing parts are plentiful.
Where to buy?: Amazon and a lot of retailers sell this one. And all the bits you may need again just needles and the tiny tip up front.
THE HOSE - IWATA BRAIDED HOSE
1/8" Bsb fitting one end to the air brush, 1/4" connected to the compressor. Although as mentioned above, I needed to use part of the Nitto attachment to the air gun to link things together on this compressor (wasn't an issue with my previous compressor).
Because of the small space I work in, a 3 mtr length hose is more than enough.
Where to buy: Amazon
THE PAINTS - HUMBROL ENAMELS

I've never appreciated Humbrol's enamel collection until now but once you get the mix of paint and thinners (or in my case turpentine) that thick goop in the small tin becomes more than shootable and looks great when dried, especially their gloss stuff. In the tool kit I also have some Citadel paints (good), Tamiya paints (good) and vallejo airbrush paints (have not had good experiences with these though.)
Thanks to the recent Gobsmasha project I can now also add Italeri paints to the mix. I only have one bottle but it's been a great addition to the collection so far.

Where to buy: Your local hobby store. They're also on Amazon too if you don't have a hobby shop handy.
Speaking of Humbrol, they have their own all purpose airbrush would looks okay for doing large area sprays and seems very affordable. Maybe reserve this one for base coats or bigger projects?
OTHER STUFF YOU MAY NEED
PAINT THINNERS/TURPENTINE - Turps in my case as it's readily available at my local supermarket. I use it to both thin enamels (mixing to a consistency of milk) and spray through the Neo airbrush to help clean it between paints. I did try Methylated Spirits for this but found Turpentine works much better.
AIRBRUSH STAND - I didn't think I'd use this much but it's a godsend. Park your brush without worrying about it falling over while you hunt about for...well whatever it is you're hunting for.
This is the exact model I used which I bought locally at Supercheap Auto.
NITRITE GLOVES - A byproduct of me getting filthy every time I work on the car, these are brilliant if you plan to spray anything you're holding in the other hand. Grab a box of 100 from your local auto parts store and you'll have gloves for months!
CURRENT PROJECT - TAMIYA MAZDA RX7 FC3S

The box to this thing has been lost of the sands of time (and moving) and I can't remember the original manufacturer of this kit (although I'm leaning towards Fujimi more than Tamiya now that I think of it.) Edit: Thanks to an old photo up on Instagram, I've found out it's an Aoshima kit.
But originally bought because I owned one in real life, I decided to honor my ownership of Mazda money pit by hitting it with Crystal White touch up paint which was the factory color mine came out in back in 1989.
The results were pretty lackluster and it's been sitting in a box ever since, occasionally being brought out to look at and thinking 'I think I should do something with this one day' and then putting it back in the crate for even more months of going nowhere.

Now that I have a workable setup, it's time to breathe some life back into this thing (even though I have no idea where the engine and window parts went - I still have everything else so if anything it can be a great practice car to get my skills back up.)
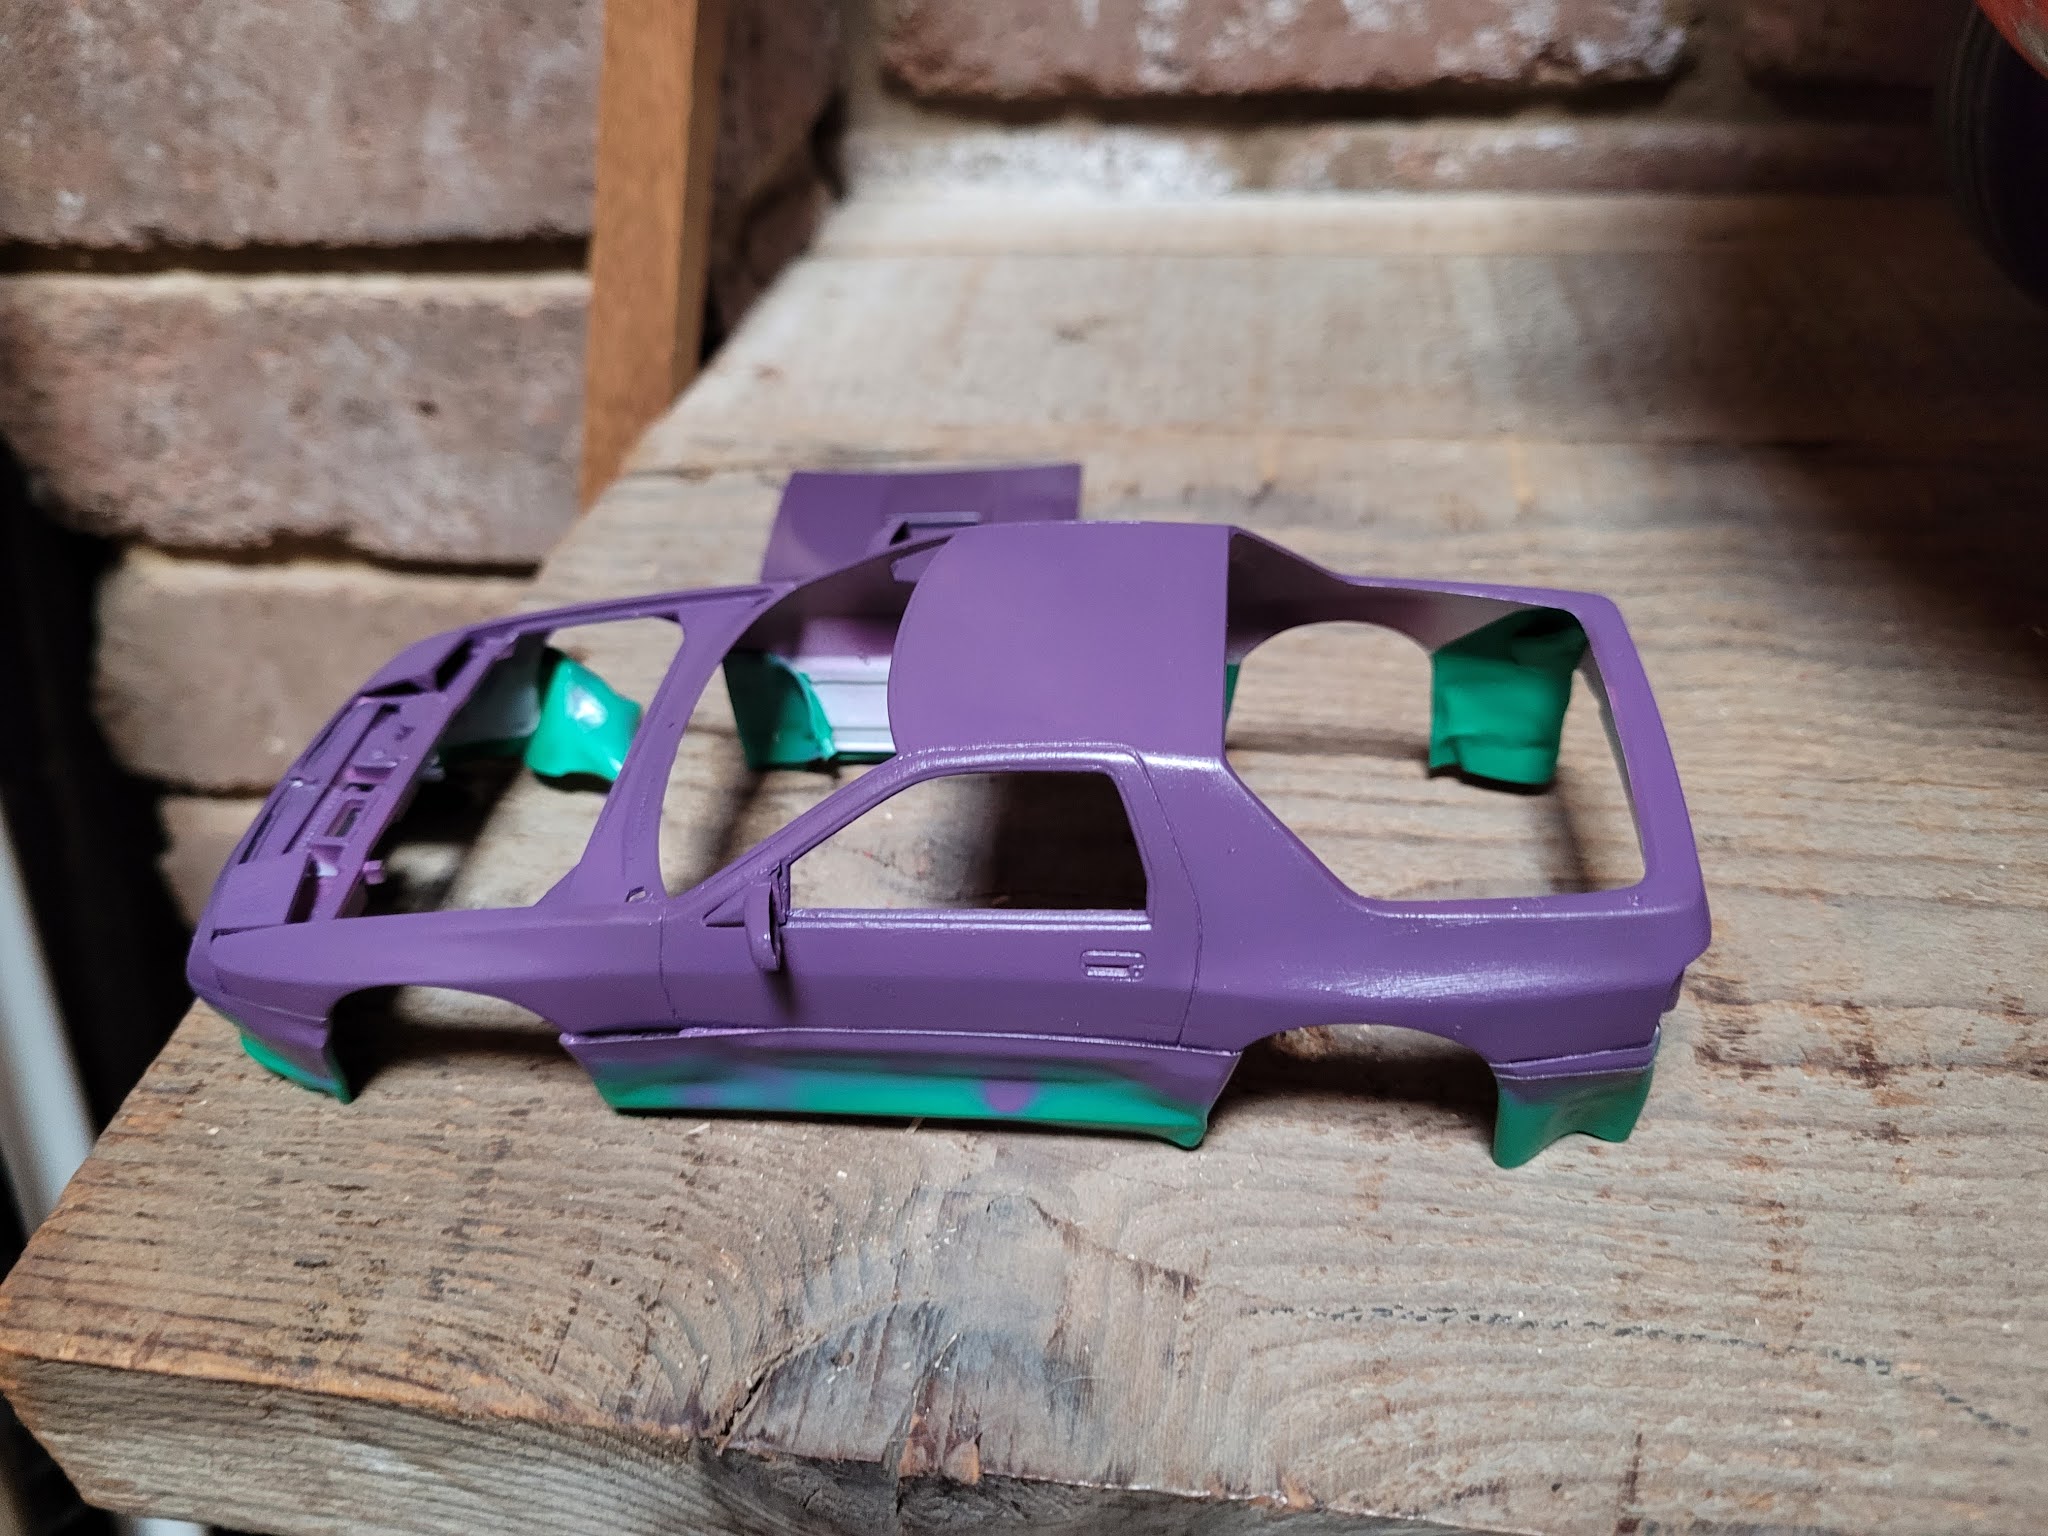
The plan is to have a two-tone Mazda, gloss purple up top and metallic blue down below. Definitely not a factory option at all but should be interesting. Because the bonnet came away easily (it never fit properly anyway) it became a great testing piece to see how well gloss purple could come up after a light sand and a few coats.

Not bad! Not the smoothest due to the sand job (top tip, work your way through sandpaper levels of grit until glass smooth) but looking a stack better than the white. Time to mask up and hit the rest of the car with the purple love!

Proper masking tape would be preferred but since I don't have that handy electrical will have to do. It looks like a stock car wreck in the booth but soon most of those blemishes will be well and truly covered!

First mix contained way too much turpentine and so most of it was wiped away. It's all about balance kids, even though it now looks worse than it started..

A couple more passes and it still looks like one of my kids have attacked my Mazda with a purple texta. Keep going though, it gets better with every pass slowly but surely.

After a few passes, things really taking shape. I'm going to let it dry for a few days and hit it with some more purple to even a few more areas out next week. I'm really enjoying this color so far and can't wait to see how it goes with the blue.


Just a little bit from each tube, rubbed lightly like you're buffing away on your own car.

A cloth is preferable but tissues can work in a pinch. Remember not to rub too deeply or use too much of the stuff as you only want to remove a tiny part of the paint to work a shine in.

After a bit of time it's looking far sharper and more reflective!


We'll let that dry for a couple of days before taking off the tape and then in a week or so, hopefully we can get some paint on the bottom half!
PROJECT TO BE CONTINUED
Comments
Post a Comment